On-the-go Gardening
On-the-go Gardening
This past March, I was able to attend a Smart Gardening conference through the MSU Extensions office. Dr. Rufus Isaacs, small fruit entomologist and professor at MSU, gave a presentation about bees as important pollinators in orchards and gardens. He shared with us some ideas on why the little guys are so helpful and how we can make them feel more welcome in our gardens.
Bees pollinate 80% of plant species that provide us and other wildlife with food. Growing plants in the garden to feed the bees introduces biodiversity into the garden, improves crop productions, slows the bee population decline, and provides wildlife to observe and enjoy.
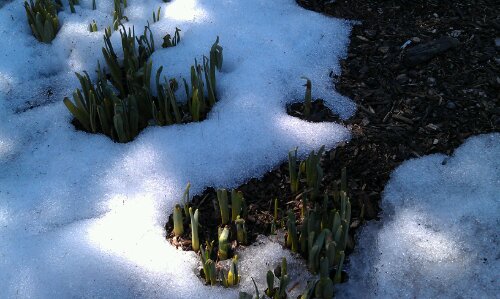
When selecting garden plants for bees, try first browsing through native plants. Also, Dr. Isaacs suggested to pick a variety of plants that bloom throughout the growing season so the bees always have a food source available. For Michigan, there are native plants resources provided free of cost at www.nativeplants.msu.edu. I used the site to look up some natives to fit in the Lot’s USDA Hardiness Zone 6a. Here are some I’m going to try:
One thing I didn’t realize before the conference is bees are both hive and solitary creatures. I am most familiar with the Honey Bee brought over from Europe in the 1600s to provide wax and honey. Pooh Bear had taught me these bees live together in hives and produce delicious golden honey. But many types of bees are actually hard-working, single mothers. After mating, they build individual nests often located in the ground. The nest cells are stocked with pollen and are sealed to protect the bee larvae when it hatches. Here are a few ways to offer housing for the garden’s bees:
Seems like a pretty obvious tip, right? However, some homeowners are afraid of bees and try to spray for them. Other gardeners go crazy with insecticides because a prized plant is being eaten by a pest. Always be cautious when spraying chemicals in the garden. Just because the insecticide is advertised to kill one type of harmful insect does not prevent it from also killing pollinators like bees and natural predators like other beneficial insects and birds. We try to avoid the use of insecticides, or any other type of pesticide, on the Lot.
Bees are not naturally aggressive and only sting when their nests are endangered or someone is actively trying to swat them from the sky. If a ground nest takes form near something like a swingset, a very simple solution is to move the swingset. If that is not possible, try making a much more attractive (and less traveled) area of the garden available for the bees.
More info on bees and other pollinators can be found at:
Pollinator Partnership
MSU Native Plants and Ecosystem Resources
As I mentioned back in January, my Other Half finished the construction of a worm bin for us. Vermicomposting, or composting utilizing worms to break down food wastes, creates a rich organic fertilizer for use in the garden. I’ve been wanting to try this for awhile because 1) we do not like tromping out into the snow and cold to the compost bin in the winter, and 2) it’s so freakin’ cool! I mean, these little guys eat most of your garbage and give you awesome fertilizer in exchange.
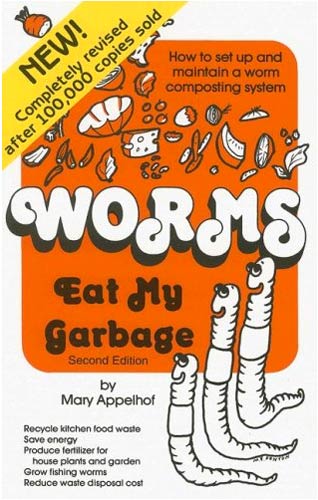 There are numerous articles online that give instructions on how to vermicompost, from creating the bin to what to feed the worms. However, Worms Eat My Garbage by Mary Appelhof is considered one of the best books on the subject. When we were ready to go pick up the worms from Flowerfield Enterprises, I chatted at length at the shop with Nancy about if I had correctly set up everything. She was great and happily answered my 21 questions on the subject.
To begin with, we decided to go with a 13 gallon plastic storage container to use as the bin. Plastic does not rot like wood, and keeps the contents of the bin neatly contained with an easy snap on-and-off lid. We chose an opaque container so light would never distress the worms whose skin has photo-sensitive cells. Holes (not too large) were drilled into the lid, around the top rim of the bin, and into the bottom of the bin. This provides air and drainage if needed. The bin was placed up on some bricks with a pan beneath it to catch excess liquid if it is ever present.

We chose to go with shredded paper for bedding. My gardening friend Mrs. R. got us started with a few bags full, and we have a steady supply now because of our home offices. The paper is dampened, not drenched, with water when placed in the bin. Along with food scraps, the worms also eat the paper. I was advised each time when food scraps are added, I should also add a handful or two of dry shredded paper. The moisture from the food will dampen the newly added paper. Some people spritz newly added paper with a water bottle, but we have yet had the need to do so with our bin.
Isn’t he great?! Much to many people’s surprise, Jim is not composed of nightcrawlers. He is a team of red worms (Eisenia fetida). Our common nightcrawler (Lumbricus terrestris) burrows quite deep and works much more slowly. Red worms hang out more closely to the surface with other types of microbes to break down waste. They work and reproduce fairly fast. For this size of bin, we started out with a pound of the red worms.
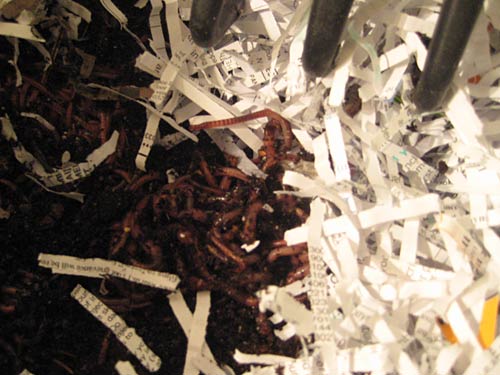
Nom, nom, nom! Below is Jim munching away on a banana peel and some spinach scraps. A handful of soil from our outside compost bin was introduced into the worm bin at the beginning so other beneficial microbes could help break down the food and make it easier for the worms to digest. The food we give Jim is mostly produce scraps. He loves our banana peels and apple cores. You can also feed composting worms bread and rinsed eggshells. In fact, Mrs. R. has said her worms like to use eggshells as nurseries for their young. We do not feed Jim bones, meat, or fats. Because of this, worm bins do not smell.

So, as with many things in this gardening journal, I am not claiming to be expert. I’m simply going to keep tabs on how we go about All-Things-Gardening on the Lot, what we screw up, and what we do better next time. Wish Jim and us luck!