When the Other Half and I returned from gallivanting around the lovely Emerald Isle, we were greeted with colder temperatures and rain. The rain subsided this past weekend, so we were able to get out into the garden and get some seasonal chores done in the sunshine and crisp, autumn air. Having lived on the Lot for six years now, we find ourselves following a similar routine each October.
Get ‘Em in the Ground
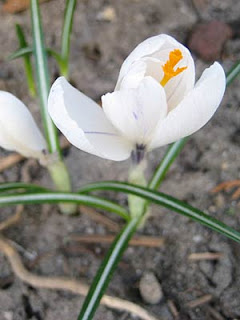
Whether it be end-of-season plant sales or spring bulbs, in our Zone 6a the time is now to get those suckers into the ground. I still had a weigela, goji berry, and rose to work into the landscape yesterday. I have yet to find a place for a beautiful, little rue I brought back from Portland with me. I try to plant any stragglers as close to the beginning of the month as possible so they can become settled in their new home before the winter arrives. Halloween has been a nice deadline for planting spring bulbs.
Bring in the Crockery
We have a handful of planters on the Lot, most being terracotta. Our first winter here, I found terracotta is not something you leave to overwinter in the garden. Moisture will freeze, expand, and destroy those lovely planters. Statues, supports, planters, wind chimes, solar lights… all of it is stowed in the garage or in the basement until spring.
Unhook Rain Barrels & Hoses
The first winter we had rain barrels installed, I learned a full, half-frozen rain barrel is unwieldy and may crush you if given the opportunity. Drain the barrels and unhook / stow the pvc now. Pull up soaker and garden hoses and put them away.
Utilize Those Clippings
The Other Half and I are not fans of paying the city to dispose of grass clippings and leaves. Both ingredients are gold for providing nutrients to the lawn and garden. The Lot always has its grass clippings mulched back into the turf. During the fall season, some of those clippings and shredded leaves are placed in both the compost bin and raised veggie beds as a balanced combination of greens and browns.
Make the Veggie Beds
Growing season is coming to a close in Zone 6a. Beyond the parsnips and a handful of cool crops, most plants are finished producing. We usually clean up the vegetable beds in the fall, removing any decaying produce and plants. The beds are then filled with equal parts shredded leaves and grass that will break down over the winter.
What Not to Do in the Garden During Fall
It kills me each fall, but when the garden is overgrown and crazy at the end of the summer and October has arrived, put away the pruners! When a plant is pruned it responds with a new flush of growth. Energy will be put into this action instead of into stores for the winter and the upcoming growing season. Don’t send those mixed messages to your plants. It’s just not nice.
Are there exceptions? Of course! If you need to prune away seed heads of aggressive self-sowers, that’s okay. Most of the time those guys are thugs anyway. I’ve also cut back hostas after the first frost has zapped the foliage.


